Snapper Safety Switches Explained: Why Your Mower Won't Start and How to Fix It
Date Released: 4 Mar 2026 Category: Blog
You're ready to mow, the battery is charged, you've got fresh fuel, and when you turn the key absolutely nothing happens. Not a click, not a splutter, just complete silence. Before you start suspecting major electrical faults or engine problems, there's an excellent chance you're dealing with a safety switch that's doing exactly what it's designed to do: preventing the mower from starting when safety conditions aren't met.
Modern ride-on mowers, including Snappers, have multiple safety switches that prevent operation in unsafe situations. These are genuinely important safety features, but they can be mystifying when you don't understand how they work. Let's demystify these switches so you can work out whether yours are functioning correctly or need attention.

Think of them like a series of gates that all need to be open before you can proceed. Close any one gate and you're stopped, even if all the others are open. This is why a single faulty or misadjusted switch can prevent starting even when everything else is perfect.
Seat switch problems usually manifest as the engine cutting out when you shift your weight, lean to one side, or hit a bump. The switch thinks you've left the seat even though you're still there. This can be caused by a worn or failing switch, or sometimes by the switch getting out of adjustment so it's barely compressed even when you're seated.
This switch is usually positioned somewhere in the brake linkage where it can detect brake engagement. When the brake is on, the switch closes. When the brake is released, it opens. After starting, you can release the brake normally because the switch requirement only applies to the starting sequence.
If your Snapper won't start and you're sure the brake is on, the brake switch might be failing or out of adjustment. The switch might not be detecting that the brake is engaged even though mechanically it is.
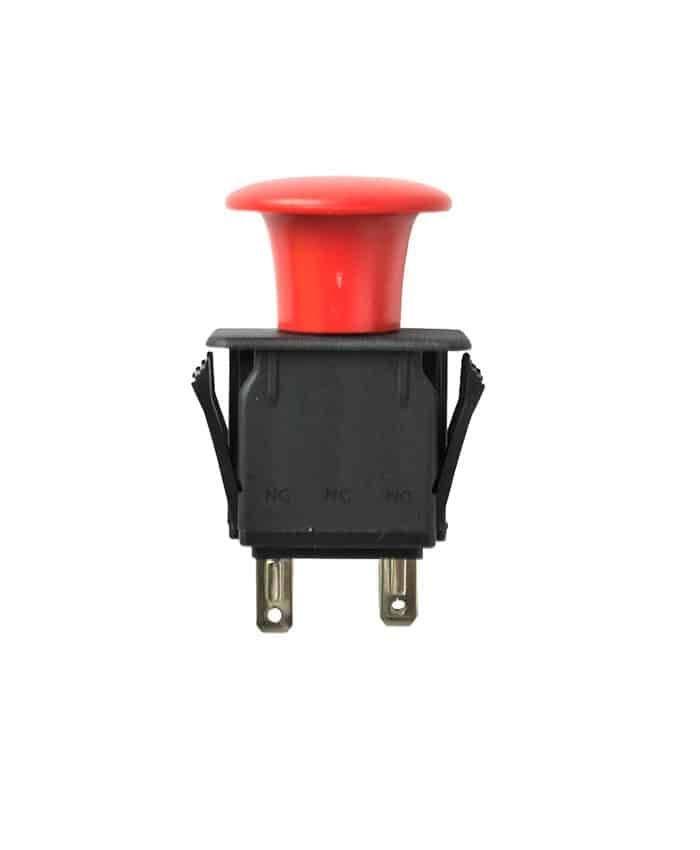
This switch is typically positioned where it can detect the blade engagement lever position. When the lever is off, the switch is satisfied. When you try to start with blades engaged, the switch prevents it.
Problems here usually mean the switch isn't detecting that blades are disengaged, or the switch itself has failed. Make absolutely certain the blade engagement is in the off position before suspecting the switch.
This switch detects whether the transmission is in neutral or whether drive engagement is off, depending on your model's design. Like other switches, it must be satisfied before the starting circuit is complete.
If you're certain everything is correct but the mower still won't start, one switch isn't detecting the correct condition. Switches can fail in the open position, meaning they never close even when they should.
You can test switches with a multimeter if you're comfortable with basic electrical testing. Find the switch you want to test, disconnect it, and check for continuity when it should be closed. No continuity means the switch has failed and needs replacing.
Alternatively, you can temporarily bypass switches one at a time to identify which one is preventing starting. This involves connecting the wires together that the switch normally connects. If the mower starts with a switch bypassed, that's your faulty switch. However, never operate the mower with switches permanently bypassed. Bypassing is purely for diagnosis, after which you should fit a replacement switch.
Note exactly how the switch is positioned and how the wires connect before removing anything. Take photographs if helpful. Switches must be positioned correctly to detect the conditions they're monitoring.
When ordering replacement switches, you need to specify which switch position you're replacing. A seat switch is different from a brake switch, which is different from a blade engagement switch. Providing your Snapper model information and describing which switch you need helps suppliers identify the correct part.
Fit the new switch in exactly the same position as the old one. Connect the wires as they were connected originally. Test the mower's starting to confirm the switch is working correctly.
Check whether adjustment is possible before buying replacement switches. Sometimes repositioning a switch or adjusting the linkage it monitors solves the problem without needing new parts.
Starting a mower in gear can cause it to lurch forward unexpectedly. Standing up whilst blades are engaged can result in you falling off into rotating blades. These aren't theoretical dangers; they're real situations that cause serious injuries.
Replace faulty switches rather than bypassing them. Switches are inexpensive compared to the value of your safety. A properly functioning safety system means you can operate your Snapper confidently knowing it won't do anything unexpected.

Check switch adjustment periodically. Linkages wear over time, which can affect how well switches detect the conditions they're monitoring. Catching adjustment issues early prevents switches failing or causing frustration.
If a switch fails, replace it promptly rather than working around it. The inconvenience of a non-starting mower usually motivates quick replacement, but sometimes switches that cause shutdowns or other issues get ignored. Don't compromise safety for convenience.
Understanding safety switches transforms them from mysterious frustrations into logical components doing important jobs. When you can't start your Snapper, systematically checking whether safety conditions are met and whether switches are detecting them correctly usually leads you straight to the solution.
Modern ride-on mowers, including Snappers, have multiple safety switches that prevent operation in unsafe situations. These are genuinely important safety features, but they can be mystifying when you don't understand how they work. Let's demystify these switches so you can work out whether yours are functioning correctly or need attention.
What Safety Switches Actually Do
Safety switches are simple electrical devices that must be closed (allowing current to flow) before the mower can start or operate. They're positioned at various points on your Snapper and respond to different conditions. When all switches are satisfied, electricity can flow to the starter and ignition. If even one switch is open (interrupting current), nothing happens when you turn the key.Think of them like a series of gates that all need to be open before you can proceed. Close any one gate and you're stopped, even if all the others are open. This is why a single faulty or misadjusted switch can prevent starting even when everything else is perfect.
The Seat Switch
The seat switch is probably the most familiar safety feature. It prevents the mower operating unless someone is sitting in the seat. The logic is straightforward: if nobody's in the seat, the mower shouldn't be running with blades engaged. This switch sits underneath the seat and is compressed when you sit down. Compressed, it closes and allows operation. When you stand up or dismount, it opens and cuts the engine. On some models, it doesn't prevent starting but will shut the engine down if you leave the seat whilst blades are engaged.Seat switch problems usually manifest as the engine cutting out when you shift your weight, lean to one side, or hit a bump. The switch thinks you've left the seat even though you're still there. This can be caused by a worn or failing switch, or sometimes by the switch getting out of adjustment so it's barely compressed even when you're seated.
The Brake Switch
Many Snapper models won't start unless the brake is engaged. The safety logic here is that you shouldn't be starting the mower whilst it's able to roll or drive. The brake switch confirms that the brake is on before allowing starting.This switch is usually positioned somewhere in the brake linkage where it can detect brake engagement. When the brake is on, the switch closes. When the brake is released, it opens. After starting, you can release the brake normally because the switch requirement only applies to the starting sequence.
If your Snapper won't start and you're sure the brake is on, the brake switch might be failing or out of adjustment. The switch might not be detecting that the brake is engaged even though mechanically it is.
The Blade Engagement Switch
Your blades shouldn't be engaged when starting. The engine has enough to do starting itself without the added load of spinning blades. The blade engagement switch ensures the blade engagement lever or PTO (power take-off) is in the off position before allowing starting.This switch is typically positioned where it can detect the blade engagement lever position. When the lever is off, the switch is satisfied. When you try to start with blades engaged, the switch prevents it.
Problems here usually mean the switch isn't detecting that blades are disengaged, or the switch itself has failed. Make absolutely certain the blade engagement is in the off position before suspecting the switch.
The Neutral or Drive Switch
Many Snapper models require the transmission to be in neutral or the drive to be disengaged before starting. You shouldn't be starting the mower whilst it's in gear. The neutral switch confirms safe conditions before allowing starting.This switch detects whether the transmission is in neutral or whether drive engagement is off, depending on your model's design. Like other switches, it must be satisfied before the starting circuit is complete.
Diagnosing Which Switch is the Problem
When your Snapper won't start and you suspect safety switches, methodical checking identifies the culprit. Start by confirming you're meeting all the safety conditions: seated properly, brake engaged, blades off, transmission in neutral or drive disengaged.If you're certain everything is correct but the mower still won't start, one switch isn't detecting the correct condition. Switches can fail in the open position, meaning they never close even when they should.
You can test switches with a multimeter if you're comfortable with basic electrical testing. Find the switch you want to test, disconnect it, and check for continuity when it should be closed. No continuity means the switch has failed and needs replacing.
Alternatively, you can temporarily bypass switches one at a time to identify which one is preventing starting. This involves connecting the wires together that the switch normally connects. If the mower starts with a switch bypassed, that's your faulty switch. However, never operate the mower with switches permanently bypassed. Bypassing is purely for diagnosis, after which you should fit a replacement switch.
Replacing Faulty Switches
Once you've identified which switch is faulty, replacement is usually straightforward. Switches are typically held in place with brackets, clips, or screws and have wire connectors that unplug.Note exactly how the switch is positioned and how the wires connect before removing anything. Take photographs if helpful. Switches must be positioned correctly to detect the conditions they're monitoring.
When ordering replacement switches, you need to specify which switch position you're replacing. A seat switch is different from a brake switch, which is different from a blade engagement switch. Providing your Snapper model information and describing which switch you need helps suppliers identify the correct part.
Fit the new switch in exactly the same position as the old one. Connect the wires as they were connected originally. Test the mower's starting to confirm the switch is working correctly.
Adjusting Rather Than Replacing
Sometimes switches aren't actually faulty; they're just out of adjustment. The seat switch might not quite close when you sit down because it's slightly mispositioned. The brake switch might not detect engagement because the linkage has worn and positions have changed slightly.Check whether adjustment is possible before buying replacement switches. Sometimes repositioning a switch or adjusting the linkage it monitors solves the problem without needing new parts.
Why You Should Never Bypass Switches Permanently
The temptation when dealing with faulty safety switches is to just bypass them permanently and be done with it. This is genuinely dangerous and a terrible idea. Safety switches exist because situations they prevent are genuinely hazardous.Starting a mower in gear can cause it to lurch forward unexpectedly. Standing up whilst blades are engaged can result in you falling off into rotating blades. These aren't theoretical dangers; they're real situations that cause serious injuries.
Replace faulty switches rather than bypassing them. Switches are inexpensive compared to the value of your safety. A properly functioning safety system means you can operate your Snapper confidently knowing it won't do anything unexpected.
Keeping Switches Working
Safety switches generally last well, but they're exposed to vibration, moisture, and dirt. Keeping connector blocks clean and dry helps prevent corrosion that can cause intermittent operation.Check switch adjustment periodically. Linkages wear over time, which can affect how well switches detect the conditions they're monitoring. Catching adjustment issues early prevents switches failing or causing frustration.
If a switch fails, replace it promptly rather than working around it. The inconvenience of a non-starting mower usually motivates quick replacement, but sometimes switches that cause shutdowns or other issues get ignored. Don't compromise safety for convenience.
Understanding safety switches transforms them from mysterious frustrations into logical components doing important jobs. When you can't start your Snapper, systematically checking whether safety conditions are met and whether switches are detecting them correctly usually leads you straight to the solution.